Saturday, November 9, 2013

Bread, don't fail me now...


No Fail Bread

Who doesn’t love a fresh loaf of bread? Whether it’s for a group dinner with friends, to accompany your favorite soup or a neighborly gift, this bread will. Not. Fail. You. 

Not a baker you say? Neither am I.  Until a few months ago I considered a bowl of easy mac an accomplishment.  Then I had a nervous breakdown (probably not really but I really needed something to punch) and decided kneading dough was better than kneading someone’s face. 


Anyway.  Here’s what you’ll need:
·      A covered cast iron dutch oven – it can be the small one. This is not optional. It’s enclosure is what will give your bread the NOT part of Will. Not. Fail. You. 
·      Approx. 3c of self-rising flour (I’ve tried white and wheat and with this bread, I prefer white)
·      Approx 1-2c of water
·      Approx ¾ tsp of rapid rise yeast
·      Approx 1 tsp of salt (any type. Rock. SeaSalt. Table.)
·      Your favorite herbs (fresh! For the love of god, use fresh. You’re making homemade bread here, not a hot pocket)
·      Your favorite cheese. I have a lot of favorites. I’ve listed some of my favorite combinations below this recipe

I know what you’re thinking. APPROXIMATELY?! Yes. Because you’ll adjust as you go along.  Why? Because this bread will. Not. Fail. You.

Combine the dry ingredients.  Add your water while stirring. It looks shaggy and not nearly wet enough, right? Add some more water. Yup – slowly and a bit at a time until your flour is wet and shaggy.  How much water did you add total? Write it down and comment here. I can never remember. 

Add your herbs and/or cheese.  You don’t have to add them – plain is delicious too. 

Cover the bowl tightly with plastic wrap and push it to the back of your counter. Now go away.  Seriously. This needs to sit for AWHILE. I usually do mine before bed and bake it the next afternoon.  In a pinch, a few hours will do. Fair warning though, the longer it sits the lighter and fluffier your bread will be. 

Ready to bake? Preheat your oven to 350’ and once it’s warmed up put your empty dutch oven in the oven to preheat.  Now, scoop some flour on a clean counter and plop that shaggy mess on it. Your hands will be a mess but still, dig in. Work the dough a bit, getting enough flour on it to where you can touch it without it sticking to you.  Then, plop it back in the bowl and tuck the plastic wrap tightly around your ball of bread. Set your kitchen timer for 30 minutes and go wash your hands.

When the timer goes off, carefully remove your extremely hot dutch oven from your oven.  Remove the lid, plop your dough in the hot dutch oven and cover it, shove it back in your hot oven and set your alarm for another 30 minutes. Go wash your hands.  You’re so close to having a treat!

When that timer goes off remove it from the oven, turn off your oven and toss your bread out on the counter. Isn’t it gorgeous? Does it have delicate little dips and valley’s of crispy goodness? A spattering of flour? Don’t you want to just rip it apart and nom nom nom? Don’t. You’ll burn your tongue (and maybe face) and it will ruin the experience.  Wait for it to cool a bit.


Don’t store this bread until it’s completely cooled. It can take awhile. I strongly suggest you serve it still warm. You can slice it and provide proper butter/oil/dipping options, or you can simply rip it to pieces like my friends and I and eat like monsters. 

Either way – enjoy it!


Some of my favorite combinations (add these to your prepared dough)

Fresh Rosemary and grated Parmesan
Herbed Goat cheese and Thyme
Italian herb and grated cheddar
Feta, basil and kalamata olives (chop those puppies finely!)
Sea salt and black pepper
Herb de Provence (in a package from the store)


~Compliments to my bestie, Stevi (the one that had the "crisis)~

Sunday, August 11, 2013

Pesto Cream Sauce...say WHAAAAAA???

I've always wanted to make a pesto cream sauce ever since I had it in a restaurant a couple years ago. Well, I attempted and it WORKED!  It was super easy to do.  I made fresh pesto with ingredients from the garden, and used it in this sauce.  However, I'm sure that you could use store bought.  I used this with pasta and chopped up some grilled chicken.


INGREDIENTS:
1/4 c. pesto (more or less to your liking. I used a lil extra)
2 c. heavy cream
2 tbl. butter
2 tbl. flour
1 med. shallot, minced
1 tsp. minced garlic
1/4 c grated romano cheese
salt and pepper, to taste

DIRECTIONS:

*melt butter in saute pan then add in challot and garlic. Cook 2-3 min over med/high heat
*add flour and stir constantly, cooking aprox 1 min
*add the cream and stir to completely mix in the flour
*adjust the heat so sauce is just under a simmer.  Once it starts to tighten up a bit, add in the pesto and cheese,  Stir until cheese is all melted and pesto is mixed in.
*salt and pepper to taste
*pour over pasta or chicken or whatever you wish to use this sauce for.
*enjoy

Saturday, June 1, 2013

The fruit of my passion...

I've been wanting to make my own ice cream ever since last summer when a friend of mine brought me some of her own home made ice cream last summer.  I borrowed hers, and low and behold, I made one of the BEST ice creams I've EVER tasted!  I made a Vanilla Passion Fruit Ice Cream!  OMG, talk about a foodgasm!!!  First off, I used real vanilla bean- about a half of a bean, split and insides scraped out.  Secondly, I used whole milk, heavy cream and eggs- the real deal ice cream.  Then, I used 2 perfectly ripe passion fruits! AHHHHHHHH, i'm getting all excited just typing this out!  I've never really had real passion fruits before and they by far outweigh any fake flavoring you will EVER encounter!  Ok, enough jibber-jabber...here is the recipe.

P.s. I am using a 1.5qt ice cream maker
P.p.s. I was scared to death of making scrambled eggs when i added the hot liquid to them.  Have to fear and as Julia Child would say, "USE CONVICTION"


INGREDIENTS

3/4 c. sugar
1/8 tsp salt
1 3/4 c. whole milk
2 eggs, beaten
1 1/2 c. heavy cream
1/2 vanilla bean, scraped
2 passion fruits, insides scraped


DIRECTIONS:

1. Combine sugar, salt, vanilla bean and milk in saucepan and whisk briskly to combine thoroughly.  Cook over medium/medium high heat, stirring occasionally until mixture almost boils.  Reduce to low.
2. While the mixture is heating on the stove, in a seperate bowl, beat 2 eggs.  Will look like scrambled eggs.
3. Gradually stir about 1/2 cup of the hot milk mixture into the beaten eggs to temper them. Once tempered, add the eggs to the remaining hot mixture.  Cook over low heat, stirring constantly until slightly thickened, about 2-3 minutes.  Remove from heat, transfer to a mixing bowl, and put in the fridge for AT LEAST 2 hours.
4. Once the mixture has chilled nicely, combine the heavy cream and scrape out the passion fruits and whisk everything well.
5. Pour the mixture into your ice cream maker, wave your hand over it and say aloud "double bubble, toil and trouble"...and switch on the machine.
6. Let it blend to your desired consistency!

Sunday, May 26, 2013

Sashay....Satay...

A coworker has been after me to try and make Chicken Satay.  It's an indian style chicken with a peanut sauce.  I've been wanting to make it for quite some time now, and I had the perfect opportunity yesterday.,,Memorial Day family get together.  First off, the recipe says to use bamboo skewers.  I say screw that and just grill the suckers as is!  Reason being, even though I soaked them prior to use, the lil bastards still burned, and it made uneven cooking of the chicken.  The "peaks" of the chicken were cooking faster than the "valleys".  Ultimately, I ended up just pulling off the skewers during cooking and just finished them regularly.  Another noteworthy mention, I used "chicken tenderloins".  They are chicken breasts cut into "chicken fingers". I bought 2 packs for the party, which was about 18 pieces and there was plenty of marinade with some to spare.  So, keep that in mind when you are making this dish for yourself...there will be LOTS of marinade.  I suppose you could reserve some and use it to baste while you grill.  I however, was short on time so I did not baste.  Chicken was a HUGE success...the rave of the party...and it was soooo easy to make.  All I had to do was turn all the ingredients into a paste with my food processor, marinade, then grill.  How easy is that?  Anyway, here it is in all it's glory....

~CHICKEN SATAY~

Ingredients: 
8-12 skinless chicken tenderloins
1 package wooden skewers

SATAY MARINADE:
1/4 cup minced lemongrass , fresh
2 shallots OR 1 small onion, sliced
4 cloves garlic
1-2 fresh red chilies, sliced, OR 1/2 tsp. to 1 tsp. cayenne pepper, to taste
1 thumb-size piece galangal OR ginger, thinly sliced
1 tsp. minced fresh turmeric OR 1/2 tsp. dried turmeric
2 Tbsp. ground coriander
2 tsp. cumin
3 Tbsp. dark soy sauce
4 Tbsp. fish sauce
5-6 Tbsp. brown sugar
2 Tbsp. vegetable oil
Dipping Sauce: see Easy Satay Peanut Sauce

If using wooden skewers, soak them in water while you prepare the meat (to prevent burning). The kitchen sink works well for this.
Place chicken in a bowl.
Place all marinade ingredients in a food processor or chopper. Process well.
Taste-test the marinade - you will taste sweet, spicy, and salty. The strongest tastes should be SWEET and SALTY in order for the finished satay to taste its best. Add more sugar or more fish sauce (in place of salt) to adjust the taste. You can also add more chili if you want it spicier.
Pour the marinade over the meat and stir well to combine. Allow at least 1 hour for marinating, or longer (up to 24 hours).
When ready to cook, thread meat onto the skewers. Tip: Fill up to 3/4 of the skewer, leaving the lower half empty so that the person grilling has a "handle" to easily turn the satay during cooking.
Grill the satay on your BBQ, OR on an indoor grill, basting the first time you time it with a little of the leftover marinade from the bottom of the bowl. OR you can broil in the oven on a broiling pan or baking sheet with the oven set to "broil" Place satay close beneath the heating element and turn the meat every 5 minutes until cooked (be sure to soak your wooden satay sticks in water before skewering). Depending on how thin your meat is, the satay should cook in 10 to 20 minutes.
Serve with Thai jasmine rice and Satay Peanut Sauce for dipping. ENJOY!

Satay Dipping Sauce
3/4 cup peanut butter
1/3 cup water
1-2 cloves garlic, minced
2 tsp. dark soy sauce
2 tsp. sesame oil
2 Tbsp. brown sugar
1 to 2 Tbsp. fish sauce, depending on desired saltiness/flavor
1/2 tsp. tamarind paste OR 1 Tbsp. lime juice
1/2 tsp. cayenne pepper, OR 1 tsp. Thai chili sauce (more or less to taste)
1/3 cup coconut milk

Place all ingredients in a blender or food processor. Blend or process until sauce is smooth. If you prefer a runnier peanut sauce, add a little more water or coconut milk.
Do a taste test, adding more fish sauce (or soy sauce) if not salty enough, or more cayenne if not spicy enough. If too salty, add a squeeze of fresh lime juice. If you'd prefer it sweeter, add a little more sugar.
Serve warm or at room temperature with my Thai Chicken Satay, Thai Pork Satay, or Vegetarian/Vegan Thai Satay. It also makes a great dip with fresh veggies, fresh rolls, or other Asian finger foods. Or combine with noodles to create a Thai-style noodle dish or cold noodle salad. Enjoy!

Thursday, May 23, 2013

Chicken Peht Peh

ER ME GERD...this is mahhhhhhvelous!!!!  If you prefer to make your own pie crust, by all means do so.  I take the easy way out and use store bought.  Also, this recipe makes for a great chicken a la king.  Just pour over fresh baked biscuits. 


Ingredients

1 1/2 pounds chicken, cubed into small cubes
1/2 teaspoon sweet paprika
1/2 teaspoon fresh sage
1/4 teaspoon fresh oregano
3 tbl butter
3 tbl all purpose flour
Salt and freshly ground black pepper
3 tablespoons extra-virgin olive oil
half a med. onion, chopped small
1 cup chopped fresh asparagus
1 cup frozen peas and diced carrots (or fresh if you prefer fresh)
 5 cloves garlic, minced (I like mine garlicy)
2 tablespoons all-purpose flour
2 cups chicken stock
1 cup heavy cream
1 store bought pie crust, unbaked and thawed if frozen

Directions

Special equipment: 9-inch cast-iron pan or pie plate

Preheat the oven to 400 degrees F.

Sprinkle the chicken tenders with salt and pepper. Heat a pan over medium-high heat and add the olive oil. When the oil begins to swirl, add the seasoned chicken and saute until cooked through.. Remove the chicken and set aside in a bowl.

To the same pan, melt the butter over med/med high heat.  Once melted add in the veggies, onion and garlic and half the herbs.  Stir and cook to tender. Then sprinkle in the flour and stir to coat the veggies and cook for about a minute to remove any flour taste it may have. Next, add the chicken stock. Stir untill the sauce becomes thick.  Then add in the cream and remaining herbs and stir.  Add salt and pepper to taste. Return the chicken to the mixture.  Simmer for a few minutes to allow all the flavors to develope and the sauce thicken and reduce.  Once you have acheived your desired thickness, remove to heat and pour into pie plate.  Unroll your pie crust over the top, scoring the top middle to allow steam to escape. Brush a little olive oil over the top.  This will make the crust nice and brown.  Place in the oven and bake till the crust is golden brown...about 20 min or so.


a Guy and his knife are NEVER parted!


So for Christmas 2012, I got probably one of the best presents EVER!!!  I got a 3 piece knife set.  But not just any knife set.  It is Guy Fieri "Knuckle Sandwich" knife set! We have a bromance every time I use them ;)  I didn't get all of them, just the 8" chef knife, 5.5" santoku, and 4" paring.  The rest will be mine, oh yes, they will be mine!


Pickles???...Chicken???...PICKLE CHICKEN????

Who would have thought that these two would go together? Let me tell you what, I could eat my weight in this dish! Super cinchy to make and DELICIOUS to the max!!!

Ingredients

4 6-ounce skinless, boneless chicken breasts
Kosher salt and freshly ground pepper
All-purpose flour, for dredging
2 tablespoons unsalted butter
1 medium onion, chopped
1 tablespoon chopped fresh thyme
1 cup chicken stock
2 large egg yolks
1/2 cup coarsely chopped dill pickles, plus 1/3 cup juice from the jar
5 scallions, finely chopped
1/4 cup chopped fresh parsley

Directions

Slice the chicken breasts in half horizontally (butterfly) to make 8 thin cutlets. Season with salt and pepper and dredge in flour. Heat the butter in a large skillet over high heat. Add the chicken in batches and cook until browned and cooked through, 3 to 4 minutes per side. Transfer to a plate.

Add the onion, thyme and 1/2 teaspoon salt to the skillet. Cook until the onion is golden, about 5 minutes. Add the chicken stock and cook until slightly reduced, 3 to 4 minutes. Reduce the heat to medium low.

Meanwhile, mix the egg yolks, pickles, pickle juice, scallions and parsley in a bowl. Stir into the broth and cook, stirring, until the sauce begins to thicken, about 1 minute. Add the chicken to the skillet and cook until the sauce thickens and the chicken is heated through, about 5 minutes (do not boil). .

Where did he go, George, where did he go...

Apparently it's been OVER a year since I last blogged.  Not sure what happened or where the time went.  Guess I've been spending too much time eating and drinking to post about it...hahaha...

Soooooo, I guess I will just make a great big GIANT blog with an assortment of things in it.  However this means I have to pull out both of my wine journals and my cookbook...oh, and lest we forget the plethora of photos on my phone that I naturally had to take of the creation delicacies.  This is going to take some time!!!   Get your doughnut ring ready and get comfy because you're in for a loooong ride...


                ~~~~~~~~~~~~~~~~~~~~~~~~~~~~~~~~~~~~~~~~~~~~~~~~~~~~~~~


In the first installment of this blog entry, we will travel back to the 1920's (well, actually it was March 16, 2013) to the rural countryside of England in a large estate, duly named "Downton Abbey".  A party was in the works- full formal table settings, 8 course meal, 8 different wines from around the world to compliment each course, and 4 friends together to share in the experience.  Ok ok, I had a Downton Abbey themed birthday party this year.  Yes it was 8 courses and yes there were 8 different wines.  Let's just say we all had A LOT of fun :)

Course #1: Rasperry Savouries
Wine #1: Muga- Rioja Spain

Ingredients for Raspberry and Blue Cheese Savories

  • 1 cup all-purpose flour
  • 1/2 cup (1 stick) butter, cut into tablespoons
  • 4 ounces blue cheese, crumbled
  • Ground black pepper
  • Raspberry preserves (about 1/4 cup)

Preparation:

1. Preheat the oven to 350 degrees. Line a baking sheet with parchment paper.
2. Place the flour, butter, and blue cheese along with few grinds of black pepper into a food processor.
3. Process the dough until it comes together and starts to form a ball.
4. Place the dough onto a lightly floured surface and knead a few times to pull the dough together.
5. Roll out to 1/8 inch thick with a floured rolling pin.
6. Cut rounds out of the dough with a floured 1-inch cutter (we used a 3/4 inch cutter)
and transfer the rounds to the parchment-lined baking sheet.
7. Using the back of a round half-teaspoon, make an indention on top of each dough round.
8. Spoon about 1/8 teaspoon of preserves onto each dough round.
9. Bake for 8-10 minutes or until the preserves are bubbling and the pastry is light golden on the bottom.

Let cool on the baking sheet for at least 10 minutes, then remove to a wire rack to cool.
Makes about 4 dozen with the 1 inch cutter and 6 dozen with the 3/4 inch cutter.

These can be stored for two days in an airtight container, place wax paper between layers.

Wine: was a good solid red wine with the perfect abount of oak and was fruity and lush.  It was not to heavy and easy on the wallet at around $20 a bottle. 

(Side note: this recipe actually came from the actual Downton Abbey menu)


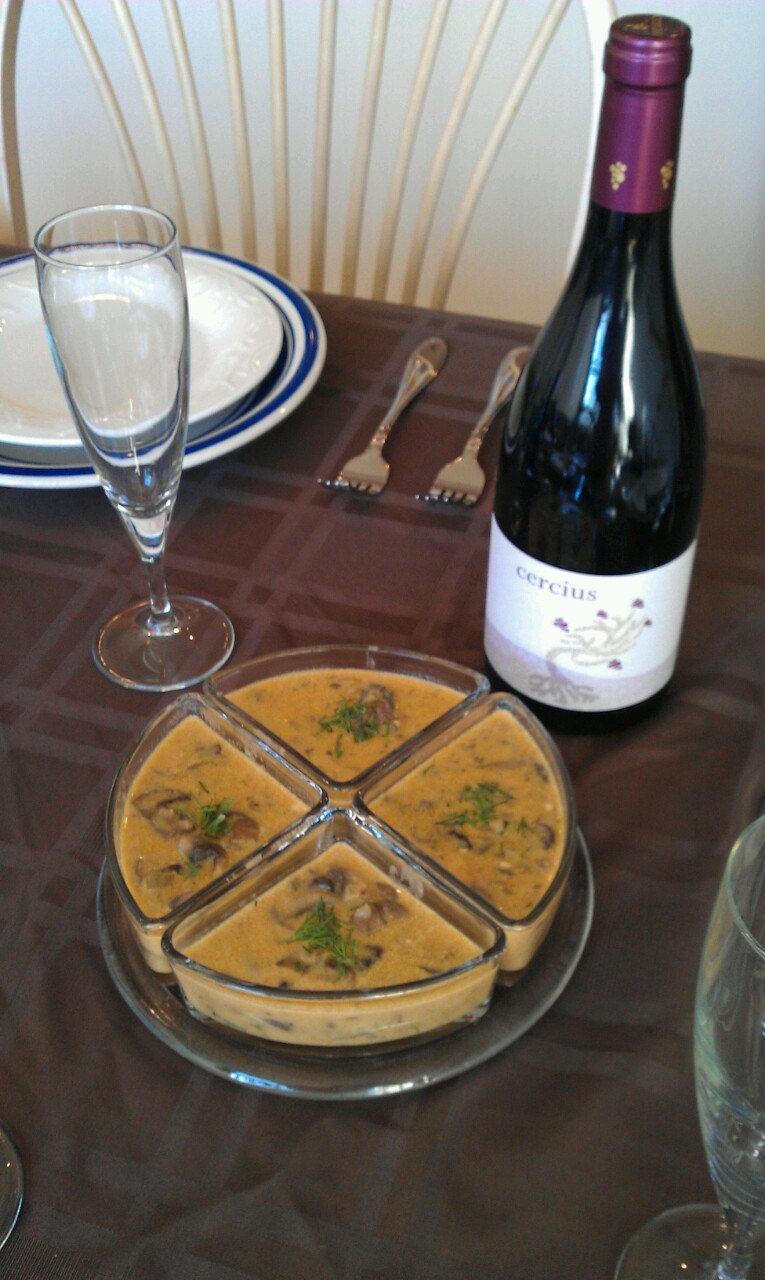
COURSE #2: Hungarian Mushroom Soup
WINE #2: Cercius- Cotes du Rhone, France

...yes, Hungarian soup isn't very English or Downtony...but I'm Hungarian and this soup is to DIE FOR!!!! (NOTE: even better the next day)

Ingredients:
  • 12 ounces mushrooms , -sliced
  • 2 cups onions , chopped
  • 2 tablespoons butter
  • 3 tablespoons flour
  • 1 cup milk
  • 2 teaspoons dill weed
  • 1 tablespoon Hungarian paprika
  • 1 tablespoon tamari soy sauce
  • 1 teaspoon salt
  • 2 cups stock
  • 2 teaspoons lemon juice , -fresh
  • 1/4 cup parsley , chopped
  • fresh ground black pepper , -to taste
  • 1/2 cup sour cream

Directions:

  1. Saute onions in 2 Tbsp stock, salt lightly.
  2. A few minutes later, add mushrooms, 1 tsp dill, 1/2 cup stock or water, soy sauce, and paprika.
  3. Cover and simmer 15 minutes.
  4. Melt butter in large saucepan.
  5. Whisk in flour and cook, whisking, a few minutes.
  6. Add milk and cook, stirring frequently, over low heat about 10 minutes - until thick.
  7. Stir in mushroom mixture and remaining stock.
  8. Cover and simmer 10-15 minutes.
  9. Just before serving, add salt, pepper, lemon juice, sour cream, and, if desired, extra dill (1 tsp).
  10. Serve garnished with parsley  
WINE: A delicious French red: 85% Grenache and 15% Syrah.  It kind of kicks you in the teeth but is fruity and smooth.  Very aromatic.  Perfect amount of acidity to cut through the soup. 


COURSE #3: Salmon in a mushroom cream sauce over asparagus.
WINE: Sancerre- Loire Valley, France


Salmon with Capers and Cream Ingredients:

  • Two pounds of salmon filets
    • 1/2 pound mushrooms, sliced
    • Five cloves garlic
    • Four tablespoons olive oil
    • Two tablespoons mustard
    • Dash of salt (to taste)
    • Dash of dill weed (to taste)
    • 1/2 cup dry red wine
    • 2-3 tablespoons of capers
    • 2 cups of heavy cream 

Directions:
  1. Wash and slice mushrooms.
  2. Mince five cloves of garlic. Use more or less garlic according to your taste. With salmon, it is hard to overdo the garlic.
  3. Wash and pat dry two pounds worth of salmon filets. The washing is important because often the water content around and on the filet is beginning to smell much stronger that the filet itself. Patting dry is important because water on the fish will dilute the flavor of the sauce you are about to prepare. This is toooo good to dilute.
  4. Sauté half of the garlic in two tablespoons of olive oil in a large, deep stainless steel skillet that has a fitting lid. Sauté for just a moment or two. The garlic will not be cooked, just warm enough to release flavor into your oil.
  5. Add the sliced mushrooms, tossing well to distribute the oil. Salt lightly. Keep tossing. When the mushrooms begin to release their liquid, remove them to a small bowl.
  6. Add just enough olive oil to cover the bottom of the pan and add remaining garlic. Stir it around to spread the minces evenly in the pan.
  7. Position the salmon filets, skin side up, over the garlic and allow them to cook for 5-10 minutes. This cook time varies a great deal from one cookware to another, one stove to another, one altitude to another. What you want is for the garlic to cook down there without turning dark. Dark garlic is bitter.
  8. Turn your filets with a large spatula. Work carefully so that most of the garlic will stick to your salmon and be staring at you after the turn is complete. Now you have the absorbent side of the fish available for flavoring. The garlic is a good start.
  9. Sprinkle with salt, smear with some good mustard, sprinkle with some dill weed, top with the mushrooms that are sitting in their little bowl waiting for this moment.
  10. Pour about a half cup of dry red wine around the sides of the pan, not on top of the fish because you will wash the flavorings off.
  11. If you like capers, sprinkle on 2-3 tablespoons of drained capers.
  12. Cook for 15-20 minutes. This time can vary greatly. The fish is done if it flakes easily with a fork.
  13. If you want to be festive and calories are not a consideration, add 2 cups of heavy cream about 5 minutes before the fish is done. The cream will get bubbly and thick, forming a delectable sauce.
  14. Serve over a bed of roasted aparagus 
WINE:
This was my favorite of the night.  It was a delicious French Chardonnay, and if you know me, I do NOT drink chardonnay.  This was by far the best I've every had and will buy again. It was sooooo much different than anything I have ever had. Had a light citrus and oak. Not overwhelming.  Was buttery and crisp with a price tag of around $25 for the bottle. 


 COURSE #5: Slowcooker English Pot Roast
WINE #5: Tormasesca- Mepricia: Puglia, Italy


Ingredients
  • 2-3 pound English Roast {aka chuck shoulder}
  • 1 large white onion
  • 1 carrot
  • 4 cloves garlic
  • 1.5 - 2 Tablespoons of Spices {I used salt, pepper, Italian seasoning, & a French spice mix}
  • 1 1/3 cups of red wine
  • 1/2 cup olive oil
  • 2/3 cup balsamic or cider vinegar 

Directions:
  1. Put the English roast on top and sprinkle with salt, pepper, and spices.
  2. Pour the wine, vinegar, & olive oil into the slow cooker, cover and turn on low.
  3. Cook for 7-8 hours and enjoy!
 The one thing I would have really liked to have done is make a roux and pour some of the sauce from the slow cooker into it along with some heavy cream to make a luscious and rich sauce/gravy to pour over.  Maybe I'll try that next time.

WINE:
I picked up this little red head because it was made in the "heel" region of Italy.  I've never had wine from there before.  Also, because it has 2 grapes I've never had the privilege of indulging before. This wine is a blend of: 40% Negromaro 30% Primitivo, 30% Cabernet Sauvignon. It's complexity complimented the beef very well. Very fruity and spicy.  Needed to breath a bit more than I allowed though.


That's all I really care to share for my party.  If you want to know more, ask me and I'll tell you :)

Chapter 2: Fun with Figs

I happened upon a recipe one day that sounded intriguing.  I thought about it, and thought about it, and thought about it for a number of days.  Finally I said to myself, "DUDE, JUST FREAKING MAKE IT".  So I did.  It was a rather complex dish to make which was surprising, however I was UP for the challenge, and it gave me a reason to use my new knife set I got for Christmas-

Pork Loin with Fig and Port Sauce

Ingredients

Sauce:


  • 2 1/2 cups port
  • 1 1/4 cups reduced-sodium chicken broth
  • 8 dried black Mission figs, coarsely chopped
  • 2 sprigs fresh rosemary
  • 2 cinnamon sticks
  • 1 tablespoon honey
  • 3 tablespoons unsalted butter, cut into pieces
  • Salt and freshly ground black pepper

Pork:

  • R>2 tablespoons olive oil
  • 2 tablespoons chopped fresh rosemary leaves
  • 1 tablespoon salt, plus additional for seasoning
  • 1 1/2 teaspoons freshly ground black pepper, plus additional for seasoning
  • 1 cup canned low-salt chicken broth
  • 1 (4 to 4 1/2-pound) boneless pork loin

Directions

For the sauce: In a heavy medium saucepan, combine the first 6 ingredients. Boil over medium-high heat until reduced by half, about 30 minutes. Discard the herb sprigs and cinnamon sticks (some of the rosemary leaves will remain in the port mixture). Transfer the port mixture to a blender and puree until smooth. Blend in the butter. Season the sauce, to taste, with salt and pepper. (The sauce can be made 1 day ahead. Cover and refrigerate. Rewarm over medium heat before using.)  Sauce is very seedy.  If you don't care for hundreds of tiny seeds in your sauce then leave it, otherwise strain through a fine strainer to remove seeds from the sauce.

For the pork:
Preheat the oven to 425 degrees F.

Stir the oil, rosemary, 1 tablespoon salt and 1 1/2 teaspoons pepper in a small bowl to blend. Place the pork loin in a heavy roasting pan. Spread the oil mixture over the pork to coat completely. Let stand for 20-25 minutes.  Then transfer to a skillet where you will brown all sides to lock in the juices.  Then, move to an oven safe dish, cover in foil and bake for about 40-45 min or until juices run clear..

Transfer the pork to a cutting board and tent with foil to keep warm. Let the pork rest 15 minutes. Pour any juices in with the port sauce if you wish to add more of a savory flavor to the sweetness of the figs. .

Using a large sharp knife, cut the pork crosswise into 1/4-inch-thick slices. Arrange the pork slices on plates. Drizzle the warm fig sauce around and serve immediately.